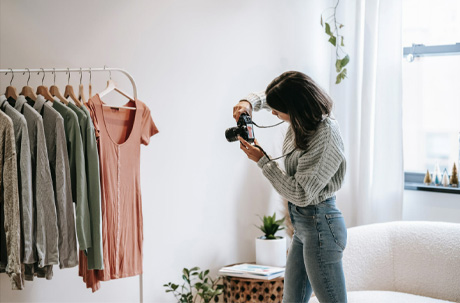
It is said that you look only as good as the cloths you wear. And to ensure that your cloths look good, it is essential to do good Ecommerce Apparel Photography.
We ensure that all your ready made garments, cloths, fabrics, fashion cloths or any similar product that you want to photograph is shot according to most exacting standards and by highly experienced photographers.
Our team has an average experience of about fourteen years in the product photography business and the Ecommerce Apparel Photographs that we click ensure that your products sell.
If you are a photographer or a merchant and clothing product photography is your concern then, you are on the right page. Let us dig into the Apparel Photography and you will have enough ideas of what to do, how to do and what are the lighting requirements and camera settings appropriate for apparel product photography.
Need of Apparel Photography
Generally, clothing photography is required catalogs, eCommerce websites, online stores or websites, and branding.No matter, what is the purpose behind photographing clothing the photographer need to ensure that the product images are clear, sharp, and of high quality. Photographs support a seamless online shopping experience.
High-quality apparel photos are essential!
Most of us have purchased clothes online or gone through online stores or E-commerce sites in search of a dress, shirt, saree, etc.
While hovering through the photographs of the apparel we make an imaginary checklist. Our decision of buying a particular garment depends on a few factors:
Looks
Description
Quality (Fabric, color, etc.)
Price
Out of the above-mentioned factors, photographers have nothing to do with the Price as it solely depends upon the seller.
So what we as a photographer can take care of is how we can make a particular garment look as original as possible. Being a photographer, no matter what is the genre, one should never compromise with the image quality of the product photos.
Most of the online customers follow a similar approach while deciding on a clothing product. For many customers, the product description is not enough to convince their buying. Hence, the photograph of the clothing is what he/ she can decide upon.
Therefore High-quality clothing photography is highly important.
If you want to start a photograph clothing or want to do clothing photography on a budget, then just read on. This step-by-step guide would help you to find out the tips on clothing photography, what mistakes should be avoided, and what equipment to be used while doing clothing photography.
How to photograph clothing?
Although photographing clothing is not as challenging as photographing jewelry due to the lack of small, shiny, and detailed pieces, you must still get your lineup right and capture all of the details. It might mean the difference between a sale and a potential customer leaving your website without purchasing.
Photography Equipment
You may keep your expenditures modest by getting a few low-cost items. If you require special lighting or displays, you might also spend extra money on more expensive equipment.
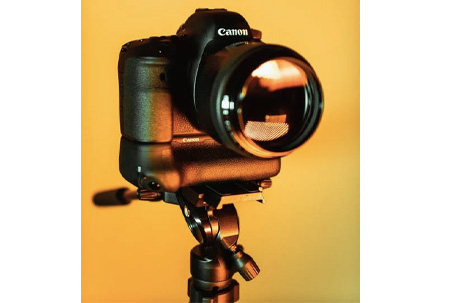
Camera:
The most expensive DSLR cameras are not generally required for clothing photography. New fashion sellers can also manage shoots using a smartphone. Use any camera you have on hand, whether it's smartphones, digital cameras, or a point-and-shoot camera. If you have the funds, you can also use a new camera in your photoshoot.
Because of its current technology, stage lighting connectivity, and physically reduced weight, mirrorless cameras are by far the best type of camera for clothing photography when compared to standard DSLR cameras.
Tripod:
A tripod prevents camera shake, which happens when your camera is accidentally moved while shooting. Because it happens to everyone at some point in their lives. Simply place your camera on the tripod, frame the product, and press the shutter button. It's straightforward. Tripods do not come in one size fits all, so make sure you pick the right one for your camera.
Clothing Photography Lighting kit
In clothing photography, lighting is crucial. You'll need lighting that can connect with your camera if you want potential customers to view all of the details of the item. You can shoot in a room with a large window that lets in a lot of light.
If you don't have access to natural light, you'll need to use artificial lighting, such as a softbot. Artificial lighting can also be purchased through online retailers. So don't get sucked into the multitude of online photographic lighting kit.
Reflections & Lights:
The LED lights and reflectors are not immediately necessary.
Even if you are about to photograph clothing in a photography studio, make sure you maintain a simple setup.
Add new elements to your clothing photography sessions as you acquire skills behind the camera.
Handle the shadows:
The output will always have a shadow side, whether you're photographing clothes with natural or artificial light. It's usually too dark to get a good image. Use a white foam board to reflect light back into the shadow to brighten it.
If you prefer taking pictures of clothes on a table, tape or clamps will keep your foam boards and sweeps in place.
Always make sure your light sources are towards the product and adjust them in a way so that they produce the least shadows or reflections.
Clothing Photography Backdrop
Many eCommerce websites have criteria about product photographs. Make sure you confirm from your client about the same and then choose the background for clothing photography.
Choosing a white background is always better because it is acceptable for most of the eCommerce website criteria.
If you want to take high-quality clothing photos of a big number of goods at once, a paperwhite sweep is a good investment. Paper sweeps utilize large rolls of white paper. They may be used to create white backdrops for clothing photography. If the sweep becomes soiled, you may cut the dirty portion and roll out a new clean one. Instead of white sweeps, a poster board might be utilized. They are cheap and may be obtained at your local pharmacy or on the internet.
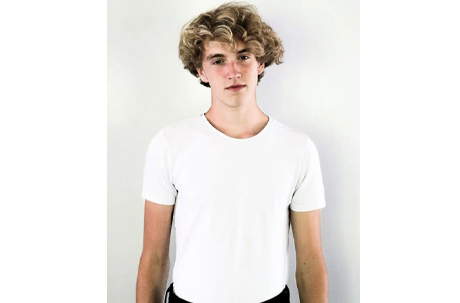
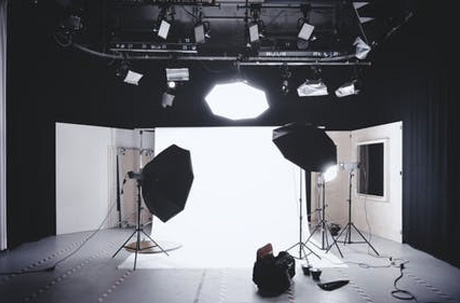
Photo studio and Camera Settings
You can turn practically any space into a photographic studio with a few basic materials. All you'll need is a camera, tripod, white wall, C-stand, masking tape, and natural light. If you have a little extra cash to spend and want more flexibility over when and where you shoot, it's worth investing in a few extra pieces of gear. Make sure your area is clutter-free. You'll need a clean atmosphere to be organized and do your best work. Sweep the roll to the floor and tape it in place, bending it to eliminate wrinkles and distracting shadows.
If you utilize a stand, you'll have greater flexibility in where you set your background and more room to move around the studio. If you're on a budget, you may tape the smooth roll to the ceiling or a wall. Arrange your merchandise in the center of the backdrop, directly in front of the camera, on a model or mannequin. To begin, position one light near your camera and direct it toward the mannequin; this will be the main light. The second light, which will act as a fill light, should be positioned at a 45-degree angle to your mannequin and further away from the first main light.
If you set the product too close to the backdrop, you may obtain some shadows. Simply move the subject further away from the backdrop to achieve a clean, white background. Reduce the brightness of your light source by half. To correctly expose your shot, all you need to do is use your camera's light meter, which you can find by peering through the viewfinder and fiddling with the settings.
For clothing photography, a high f/stop, between f/8 and f/11, is recommended. You'll be able to obtain a better image of your clothing goods this way. Shutter speed refers to the amount of time your shutter remains open. The shutter speed for garment photography should be approximately 1/125.
For garment photography, ISO values should be between 400 and 800. The sort of lighting you use will have an impact on this. If you're shooting in artificial light, increase the ISO to 600 or 800 to decrease noise.
Tips on Clothing Photography
Clothing photography is essential for any fashion business, whether online or off. It is critical to have good apparel pictures if you run an online fashion business or are planning to open one. Clothing images must be compromised because they may make or ruin your clothing business. Due to the lack of salespeople on online platforms, E-Commerce shops rely on chatbots to describe the product's benefits to customers.
Good product photography has the ability to convert spectators into potential consumers. Using nice apparel images is the best method to wow potential shoppers. Clothing photography that is done well showcases the product quality in the best light possible, supporting customers in reaching a final decision regarding an item of clothing.
1) Double-check that the clothes is in the right place before you start.
Professional product photographers should ensure that the product being photographed is well-positioned and clean. Even for Clothing Photography, this is a required step.
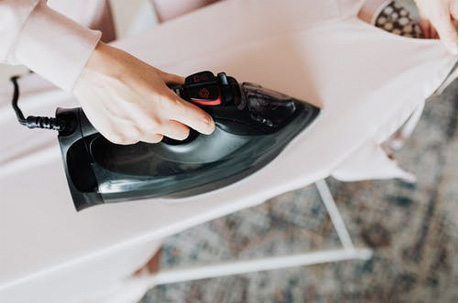
Make sure the material is pressed and lint-free.
Check for stray threads, discolored fabric, tags, or stickers, and either remove or hide them. You might be wondering why we're focusing on these issues when Photoshop could simply address them. Photoshop editing will never be able to match the level of perfection that excellent clothes conditioning can provide.
It may take a few extra minutes, but it will result in excellence, which will lead to client happiness. Excessive editing diminishes the quality of the images, which is something your buyer does not desire.
2) I prefer to use a tripod stand when taking pictures.
Any photography would be ruined by shaky images. So, whenever you're photographing garments for business purposes, attempt to utilize a tripod stand.
In addition to resting the photographer's hands, a camera mounted on tripod support can take more consistent photographs.
3) Keep the background clean at all times.
When photographing clothing you must keep any distractions away from the subject.
4) Use a mannequin or a model.
Flat lay photography may make it harder for potential clients to judge the genuine appearance of the apparel. Mannequins are an excellent, low-cost substitute for professional models. Mannequins in a static position are great for the best shots.
Use the ghost mannequin option during photo editing if you think the mannequins will detract from the outfit.
5) Enough light is necessary
Consistent lighting conditions are critical. To have a decent lighting setup during production, you don't necessarily have to spend a lot of money. Using a lot of natural light from wide windows can provide the required high-quality lighting. If natural sunlight is not available, artificial lighting equipment can be used to create the desired effect.
6) Make sure the details on the fabric and accurate colors are properly displayed
In addition to the written description, close-up photos of the fabric are recommended for clothing photography. It will assist to draw attention to textural features like the knitting or the fabric's distinctive pattern. The fine details and accurate colors in the images may help clients judge the quality more precisely.
7) Try 360-degree photography.
Allow clients to experience the panoramic perspective of the photographs from all angles by using 360 photography to make clothing photography more fascinating. This would help them to give an in-person experience. This might excite their interest in making a final decision.
8) Employing soft shadows might be beneficial
Small or soft shadows are more subtle and eliminate distractions. Light diffusers or natural light arrangements can be used to create soft shadows.
9) Photograph garments from as many angles as possible
Clothing photography would be effective if shot from a number of angles since this helps to show all the details more accurately and efficiently. The finest angles for demonstrating photography ability are side and three-quarter angles.
10) Do not be impatient
Patience is required for high-quality photography and to get the desired results, especially when photographing clothes.
Styling Ideas for Apparel Photography
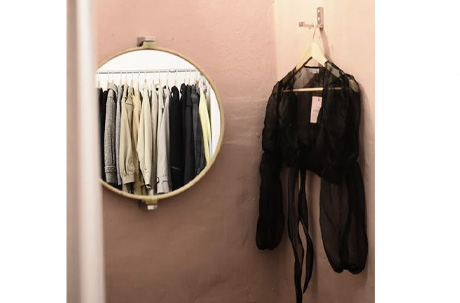
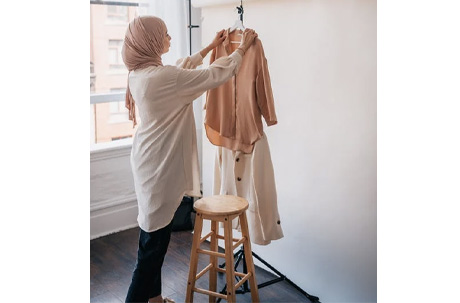
Using Hangers
Hanging apparel is used to draw attention to products at eye level. It's less expensive and takes less time than the other methods discussed previously. The icon is then taken after hanging the vesture on a hanger against a wall or white backdrop.
Hanging clothing works well for things made of lightweight fabrics, such as silk. The vesture will not wrinkle after it is finished.
Flat lay
The term "flat lay" refers to placing transcribing items on a flat area and then selecting an icon from on top of them. Bird's-eye reading is another name for it. Flat lay photography may be a good alternative to mannequins and models, and it can help you create beautiful product images that sell.
It's a popular technique for social media images. However, you may also use it to create content for your website.
Flat lay may be a good option for a common covering that people will perceive themselves in:
Jeans, T-shirts Sweaters, Pants for sports, Beanies, Socks and so on.
More intricate clothing, like sports or outdoor gear, may require the use of a model or mannequin to demonstrate the job.
Editing Tips
To get rid of blemishes, use the Spot Healing Tool.
You'll never be able to remove every single wrinkle no matter how much you iron the clothes. And it's here that writing comes in handy. There are three major techniques to get rid of imperfections on garments, and we'll show you how to utilize all of them.
Mistreatment of the spot healing brush tool is the primary and most typical way. Once you've made your decision, all you have to do is click on the imperfection, and Photoshop will automatically erase it.
The spot healing brush tool can often leave unsightly blotches inside the affected regions. As a result, you'll be able to utilize the patch tool instead whenever this happens. As you draw around the flaw, click and hold down your mouse.
After you've created a selection, click it again and drag it to a blank area inside the image. Photoshop then duplicates that piece in order to mask the unsightly components.
Consider using the clone stamp tool if you're dealing with a lot of creases. Alt+click to repeat a smooth part, then click again to apply it to the wrinkles. It'll leave a few marks, so feel free to use the spot healing brush or the patch tool as needed.
Frequency Separation Can Help You Get Rid Of Wrinkles
If you have minor wrinkles that seem impossible to remove, try frequency separation to make your clothes look more swish. It may appear tough, yet it is simple to attempt.
To begin, make two copies of your image. Call the first one Low Frequency and the second one High Frequency.
An example of how to remove wrinkles from vesture photographs in Photoshop using frequency separation
Choose the Low-Frequency layer and hide the High-Frequency layer. Filter, then Blur, and then Mathematician Blur. Increase the pixel radius until the creases are no longer apparent.
Now go to High-Frequency and click on the box where the attention icon used to be in order to make it visible again. Attend Image and select Apply Image from the drop-down menu. Choose Low Freq as your Layer, then go to Mixing and pick Workout, then Okay.
When the dialogue box has closed, go to the Layers panel and change the mixing mode to Linear lightweight.
Select Low-Frequency, then go to the Tools Panel, right-click on the comb Tool, and choose Mixer Brush Tool from the drop-down menu.
Change the wet value from three to five in the options bar. Now, paint on the wrinkles and watch them go away.
Mistakes to be avoided in Apparel Photography
Every photographer is prone to mistakes. Even a professional photographer can also make mistakes but what is important is that the mistakes are not repeated. We have created guidelines on clothing photography so that you get to know what can be called mistakes.
While doing clothing product photography there are several things that are to be kept in mind such as white balance, color correction, back or hair light, etc. So, it is okay if you miss any of them but you should make sure that you never repeat them.
1.Photographing linted clothes
When you apply digital zoom on the product every detail of the garment is visible. Make sure there are no extra threads or any lint.
2.Styling the garments in busy backgrounds
Styling textured or designer outfits on the busy background can be distractive. Make sure plain background preferably grey or white background is used.
3.Sticking to a single light setup
Not having enough light or not changing the lighting angles can be deceptive at times. Merely to determine the type of material that an object is composed of, whether it is glossy or matte, and whether it is black or charcoal grey. Having correctly exposed images will accurately display product color and other details, as well as make your stock seem clean and polished. A lot of light also means your camera can take higher-quality pictures with less "noise" or "texture" and more clarity.
4.Not changing camera settings for different colors and designs of clothes
Changing the angle of the camera is very important to cover the overall design and appearance of the garment.
5.Not having a mannequin or not using the ghost mannequin technique
It will not give a view of the fit of the product to the customers.
6.Not editing
Cropping, alignment, color, and background modifications are all common mistakes made by eCommerce retailers when it comes to product images. It is best if you maintain your crop product images identically, alignment them properly, and backdrops consistent from one image to the next in the collection.
7.Over editing
Over editing the clothing photographs will cause the photograph to look different from the original product and hence the product images would lose authenticity and they would most likely be returned or not acceptable to customers.
8.Maintain a rhythm
Make sure all of your goods are the same size and are centered within your image, with all angles, corners, and edges aligned. Cropping product photographs evenly, like aligning them, is crucial for giving clients a uniform online buying experience.
Choosing a single background style and sticking with it during post-production may also help you save time. The least amount of attention from your apparel or other merchandise is frequently regarded to be white or light grey backdrops.
Remember the product photograph is the face of a company, so anything going wrong with the complete picture would leave an impact on the brand or company's fame. So, it is very essential to photograph product images with great dedication and patience.
That was all about the Apparel Photography guide. We hope that all the information provided in this article would be helpful to you and you soon you will excel in photographing clothing.
For more guides or any assistance regarding apparel photography or product, photography feel free to drop a mail or contact us directly.