Beautiful photographs, with the appropriate tone, texture, and models, guarantee that your product catalogue performs what it was designed to do.
We at Ecommerce Photography India make certain that your product catalogue images are of the highest quality. We make sure that your photographs speak to your consumers by combining technology and skill.
For eCommerce businesses, having an online product catalogue is very important and who understands it better than us.
Product Catalogue photography may improve the appearance of your items while also enhancing your brand. The images used to visually show the product and its qualities are an essential aspect of catalogues.
To approach your items as data assets that give greater insights into how to manage a successful eCommerce business, you must create product photography catalogues.
What do you mean by product catalogue photography?
Product photography is usually referred to commercial photography that intakes production of high-quality images for mercantile use. The product spectrum may vary from a range of various items to lavish cuisines. Product photography enhances an object's appeal and compels it to make it more attractive. Compelling product photos may be used to sell as digital image of the product in ecommerce business. These visual appearance of product images are used in catalog, brochure, blog post, online stores or in a website.
Examples of product photography are sighted in our day-to-day life, while we travel, we see them on big-big hoardings.

What is a Catalogue photoshoot?
Catalogue photography has an impression of the simplest photography styles. Its objective is to sell what it displays (product photographs, product images) and focuses on brand image. The key point difference between catalogue photography and product photography is the substitution of the model.
Types of Product Photography:
Following are in-listed six general categories of product shots:
1. Individual shots.
Typical types of product photos, the individual shot limits only one object in the frame. These are highlighted in product catalogs, banner images and food photography. Let's have a look of one photo in this below example.
The photography of this muffin is taken with a light background so that all the attention of the seeker falls on the product photo.

2. Group shots.
The collection of multiple photography taken by product photographers are described as group shots. These types of product images are best for social media posts and advertisements for, online stores, online retailers, as the online shoppers get a tasteful of the brand. Let's have a look of this vibrant group shots taken by a professional product photographer.

3. Lifestyle shots.
Product photographers' showcasing professional photography where the products are displayed in action. Have a glance of this brilliant product photo

4. Scale shots.
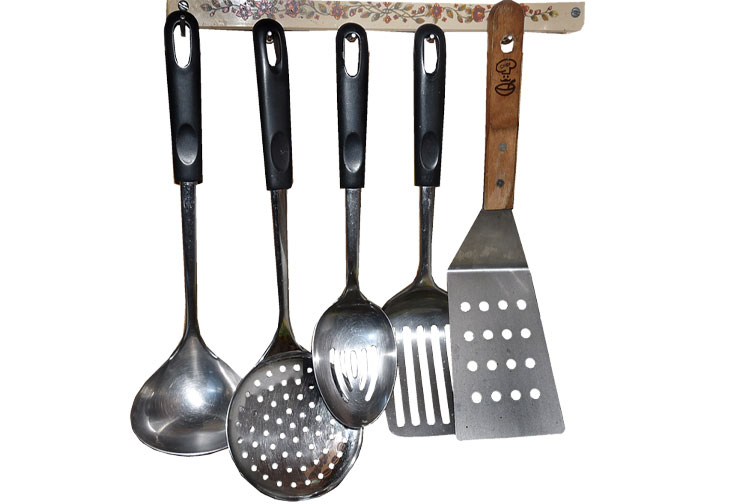
Scale shots assists customers achieve better understanding of the actual size of a product by comparing it with other mundane items. Customers will be aided to visualize products in their normal lives and increase their confidence when purchasing online. Dive through this product photography of scale shots

5. Detailed shots.
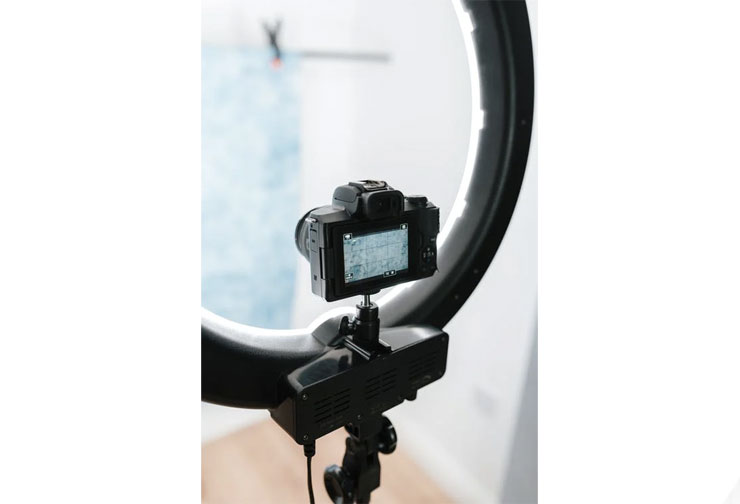
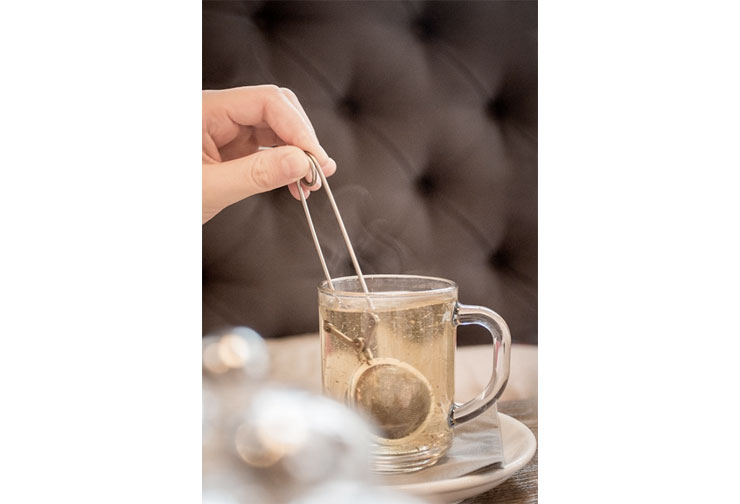
Detailed shots are highly recommended by professional product photographers for quality product photos of intricate small items. This type of product photography frequently requires specific lighting setup and proper camera equipment.

6. Packaging shots.
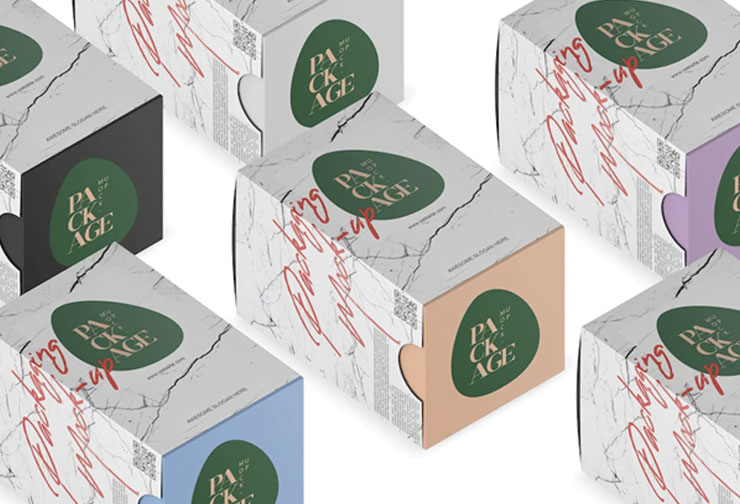
When it comes to successfully advertising a brand, the product packaging places a crucial role! Beautiful product packaging enhances the brand image and the customers have a pleasant shopping experience, either be it from shopping online or retail stores. Packaging shots, like this example will make a clearer picture of what has been said.

How do I photograph a product Catalogue?
Product catalogues have been a primary medium to advertise companies' brand image and showcase their products in rainbow spectrum since a very long time. A vital part of catalogues are the product images used to visually display the product and its intricate features. With this in mind, it is essential that catalogue photography presents the product photo in such a way that makes it alluring to its intended audience.
Here we have highlighted some product photography tips.
LIGHTING
One of the most dominant elements in capturing high quality images of product photo are having perfect lighting or adequate light sources. It is essential as poor light source can make the product photos lose their ability to connect with customers and have a captivating effect on them. For product photography, there are two types of light sources: natural light and artificial light.
Natural light: If you have a tight budget, natural light is your savior! But just because this is the cheaper option doesn't mean image quality is hampered. Just make sure you're shoot takes place during the day when the sun is at its peak.
Artificial light: If you have the budget to splurge on photo studio for studio lightings or you shoot takes place during different times schedule, artificial light may be beneficial.
BACKGROUND
A busy or matriculate background will draw attention away from the product and its features. Therefore, using a white background helps create your product photography which enhances image quality.
CAMERA EQUIPMENT
Tripods give you firmness and opens up ranges of different angles for professional product photographer. The camera settings must be specifically fixed as per needed for example the lighting setup, white balance, soften shadows, flash setting etc. If you're using a mobile, then make sure the mobile gripe is firm.
POST-PROCESSING
A product photo can be intensified in many ways in product photography process. Photo editing software, such as Photoshop, can improve all the available pixels and various elements of catalogue photography by letting you fill light, background removal, and many more and let you achieve your final image. Although Photoshop is a purchasable app, hence to save money you can google search for free tools for photo editing. Light tent, an affordable option for a backdrop lets you build your own light tent. Optimizing high quality images is mandatory because larger the image on your ecommerce website, the slower the page load speed.
What does product photography include?
Product photography can include food, fashion, or everyday products, such as groceries and books.
The main question arises is, what equipment are necessary for product photography?
If being direct and theoretical, all you need for product photography is a camera with proper camera setting. During practice, the outcomes will be less sufficient unless you have other efficient tools. As with any strive, all the difference in the world is made by having the right tools.
In the end, the right tools will save you time, energy, and give you markedly excellent outcomes.
Stating the above-mentioned facts, here is a product photography do to list to get you started in the thrilling world of product photography:
Product Photography Camera-
Standard quality camera is very required to take the best high quality product shots. Some people attempt to get professional product photography by using their cell phone camera or tablet camera to take product photographs. However, devices like that will never be able to match and mimic the intensity and dramatic effects that are attainable with a true professional category camera. DSLR camera with macro proficiency are highly recommended for close-ups for product photography shoots, as well as several different varieties of lenses.
If you're wondering, how can I segregate, which camera Lense is best for product photography, there is no single answer to that. You'll need to have as many divergent lenses as possible at your disposal to habit the context of the surroundings and the situation. Even if you are not familiar with the categories of camera lenses, at a basic level, you'll need a zoom lens and a macro lens. You may also want to acquire a wide angle lens, as this can give you an enthralling perspective with product photography.
The sales representative of your camera will be able to assist you with your lens purchase decisions and help you to achieve your requirements for becoming a successful professional product photographer.
Tripod-
For product photography, Tripod is an absolute and vital necessity for firm and exceptional product shoots. The tripod enables the photographer to achieve steady quality images, arrange the subject without moving or adjusting the camera, and to take special angle shots that would be out of the question to manage by hand. Consider procuring a sidearm attachment for your tripod. This will give you variety range of options for different angles for product photography.
Reflectors-
Reflectors aid product photographers to direct- or misguide- light (where it be natural lighting or artificial light) on or around the subject (product). You can put money into commercial reflectors (or reflector cards) or fashion DIY reflectors created out of household materials such as aluminum foil and mirrors, etc.
Reflector cards are also very beneficial when natural light is at a slightest. You may also want to put money into colored reflectors, which can illuminate the product in a variety of subtle and crafty colors without the use of a filter.
Light-
The secret to retain intricate and brilliant product shots is having a pleasant light source. For high quality images both natural light and artificial light can be utilized to shed light on and explicate the subject and capture all its appealing properties. Commercial product photography's number one need is lighting which is indeed helpful.
Lamps feature full-spectrum bulbs, 360-degree articulating heads, and versatile adaptable height mechanisms are a boon for influencing an illuminating artificial light source. As you gradually progress in your product photography venture, you can test with lighting from different angles to see the substantial difference the light can make.
Backgrounds-
Backgrounds can add a surprising and creative level of finish, consistency and overtone to product photographs. Backgrounds can be created of nearly anything; rolling velvet fabric, a collection of props such as river stones, a piece of weathered driftwood, and popularly used white sheets of long charts for an ivory white background effect and etc. Vinyl sheets with pre-printed backgrounds can also be bought in almost any pattern or style or texture.
If you invest in a mobile photo studio, you'll thoughtlessly have a background that will scrape out any part of the room or object you don't want to pop up in the shot. Even if you're taking single shots that are to be brad cast for selling products with a transparent or white background, it can be helpful to photograph against a green screen, so the figure can be easily outlined in the software editing stage.
Accessories-
Unusual accessories such as umbrellas, scarves are excellent in the aid to manipulate any source of light (be it natural lighting or artificial lighting), so it's always thoughtful to keep a miscellany of these things on hand during a professional product shoot.
Photo Editing Software-
Once you are finally done with your product shoot, you'll want to download the images into a photo editing software (commonly Photoshop is used for such product photograph editing). Photo editing software will allow you a spectrum of formatting and manipulating tools so that the product images can stick to your necessities and your stylistic predilection.
Adobe Photoshop and its extension, including Adobe Photoshop Lightroom are most frequently used photo editing software. It is obvious, you'll also require a computer or a laptop on which you can download your images and editing software.
There's little to no contrast between Mac and Windows computers as far as the outcomes you'll get from utilizing photo editing software, so it's not at all obligatory to spend money in a separate computer for your product photography.
Below are in listed 10 vital components to any successful product photography project:
1. Proficient product photographers
Not just any good photographer will do for your product photography project; the product photography must be an outcome of an experienced and esteemed product photographer. These photographers should be able to meet the below stated critical skills:
Product lighting: The key point skills are illuminating the product using strobe or continuous light source 1) for the high image quality, and 2) for production. Lighting has a massive result on production and quality- if you hire a photographer that does not possess in product lighting experience you will likely be dismayed with the image quality and the daily production rates.
Production minded: When we are talking about production minded, we are not simply directing to the increasement of mass production. It is observed that many skillful photographers over the years are able to work quickly and accurately whereas others simply cannot get out of the 'creative mindset' and balance production with quality. Experienced product photographers acknowledge the imaginative / quality / production balance and are able to produce quality images swiftly.
Product photography equipment: Product photographers are used to dealing with still photography equipment- table tops, camera stands, strobe and continuous lights etc.- and often in restricted spaces like a corner of a distribution center or retail store.
2. Accurate product lists
In order for the fruitful productiveness of photographer, they need to have exact product lists. These product lists need to be checked with the product serial number on the package so that the photographer is able to swiftly match the product he or she has in their possession with a product number on the supplied list. Incorrect product lists can waste an un-matchable amount of the photographer's time as they try to puzzle through part numbers and UPCs on packages versus those on lists.
3. Systems for recording product images as they are captured
The most time-consuming task is related to renaming product images once they are captured by the photographer, keeping a check on which products need distinct image views (front, back, top etc.), and tracing which products have been imaged and which have not. These tasks are automated by Image Production Management software enabling the photographer to concentrate on what they do best- capturing high quality product images, briskly. Although for companies that are either not conscious of these solutions or have their own in-built quick fix, the key point is to manage these tasks as best you can- most companies use a series of product number and image view spreadsheets.
4. Quality product photography equipment
It is not at all necessary to buy a very expensive sophisticated and the best product photography equipment on the retail but it should be sufficient to produce high-volume, high-quality product images. This equipment must include the following: transparent or translucent photography tables, backdrops with stands, camera stands, strobe or continuous lights with stands, consumer, semi-pro or pro digital SLR cameras, laptops tethered to the camera, and barcode scanners (for products that have UPCs).
5. Workflows for formatting and distributing product images
When quality assurance standards of photographed products, whose images have been edited, they need to be formatted according to the specific requirements set out by your internal departments- marketing, cataloging, e-commerce- and your customers. It is not unusual for colossal manufacturers to format their images for more than 50 purchasers. Again, image formatting and distribution can be very time-consumingly dull and gradual without efficient workflows and tools.
6. Adequate workspace for equipment, people, and products
Most product imaging projects come to pass in a warehouse, distribution center, store, office, or photographer's studio or any outdoor place with scenic views. The proportion of the space can have a notable influence on production rates. In general, the more space the better.
The following parameters that affect the space of your project are understated:
The number of products that can be ordered from and returned to archive at one time
The prevalence that products can be ordered from and returned to inventory at one time
The number of photographers on the project
The size and weight of your products
The extent products need to be unpacked, cleaned and / collected prior to photography
The extent your products need to be repackaged after photography
7. Systems for project management and reporting
Many large scale imaging projects have several and various stakeholders that be in need of ingress to progress reports, image downloading and various project management functions e.g., product list management, QA, image editing, image formatting. Important factors for project success lies in the system that provide easy access to project management and reporting functions.
8. QA processes to ensure images meet quality standards
A suggested finest practice is to review all images once they have been edited to make certain they encounter your quality standards as well as the standards of your customers (important if you are a manufacturer and sending images to your customers / resellers). The QA team will review edited images and consent to the ones that meet the standard level and reject the ones that do not. Without suitable workflows, the QA and image editing process will be steady and poor quality images will go unobserved until it is too late.
9. Workflows for ordering, prepping, photographing and returning products
Product imaging projects cover a lot about logistics and organization as they are about authentic photography. Well organized workflows are very important especially when it comes to ordering products from inventory, preparing products for the photographer (usually done by a photography assistant), photographing the product and returning the products to achieve. If the logistics and organizational elements of a product photography project are not advantages you could find your photographer spending 80% of their time dealing with these issues and not taking images of your products.
10. Systematic workflows for editing product images
Photography is only part of the overall product photography process. Once the images are captured at the photography studio by the professional photographers then they are need to be edited by imaging technicians. These technicians create clipping paths to remove the background, adjust levels and crop the image to remove excessive white space. For the fluid run of the image editing process, editors need way in to the images once they have been photographed and they need a place to save them for quality affirmation to do their evaluation.
How do I organize my product photography?
You will need the following equipment's:
A camera
When it comes to purchasing a camera for yourself do not go crazy in menace to buy a super expensive one to shoot great photos. While shooting images with a Nikon D810 (~1,51,991 rupees) sporting a 105mm f1.4 lens (~56,236.67) is awesome, but it's also totally needless in this case.
Still, if you're feeling elated and have the budget for a new camera system for any project, then it is highly suggested to have a thorough information regarding various camera brands and their specific given features, which offers tips to help you pick out a good camera for product photography. If all you have is a smartphone, that will also work. You can make use of your smartphone and capture excellent photographs.
So, what camera do you require? You should just start out with whatever you have handy and see what the outcomes you get out of it. It's a very common myth that it's the camera that takes the pictures. In real life, the camera is only one piece of the whole. A photograph is created out of a series of possibilities that includes: lighting, exposure, styling, and post-processing.
A tripod, focus and ...
Not getting in the technical realm, but you're going to set your camera to a very small space or aperture so that you can have the most depth of field your camera is capable of.
The width of the depth of field defines the detailed area of sharp focus and to get to that you require the maximum f/stop number your camera can obtain. Shutter speed and f/stop are related. Since a greater f/stop number, like f/8, lets in less light, you'll need to check that by using a slower shutter speed to allow more light source through.
When a camera has a slow shutter, you can't hand hold it or the subject will be blurry, so to that difficulty, tripod avails to your aid. If you're highly interested in learning more about the fundamentals of photography, spend time reading blogs of famous professional product photographers. It is a significant realization that most point-and-shoots may not allow you to choose your f/stop. That's OK and there are ways to get around this, which you will be learning step by step.
Again, you shouldn't need to spend your hard earned money on a tripod at your beginning stages of learning and adventure and there are many, many options out there that are under 2,279.87 rupees. If you smartly window shop on any online store and compare positively you can get a proper value for deal.
A white background.
When the mention of white background pops, there are lots of options and suggestions for a white background and if you're going to be shooting a lot, you may want to get a white sweep from any retail store. The most preferred are prefer a paper sweep because sweeps get dirty, and you can just cut off the dirty part and roll a new piece down.
A really economical alternative is to go to your local drugstore or art store and buy some poster board. Poster boards are really economically cheap and a good option for a beginner. Try to look for pure white as off-white or cream color will be a more difficult.
White bounce cards made of foam board.
When you're lighting with window light, you will notice that there will appear a bright side where the light is striking the product and a shadow side. This shadow side will generally be too dark (black) and so we usually use something white to reflect the light back into the shadow, illuminating it up. Foam board makes a great bounce card because it is rigid and white.
Alternatively, you can use black foam board to make the depth of the shadows deeper. This is significantly helpful if you're shooting a white product on a white background. Adding black foam board to the sides, just outside of the photo, behind the product will form a dark edge on the white product. Combine a white bounce card at the front and black bounce cards in the back for a additional sophisticated lighting setup.
You can buy foam board by shopping online or at a local drugstore.
A table.
A standard, 24-27 inch wide folding table works just perfect.
Tape.
Depending on the type of table you are dealing and working with, you can use tape or clamps to firm your board so that it sweeps properly.
The right room.
If you have a room with windows next to a wall, then that is the perfect setting. The bigger the window, the more natural light you'll get in. Being adjacent to the window will create a softer light with darker, softer shadows. Being farther away will give a more even light, but with lighter, sharper shadows.
Few more suggestions for product photography:
Set up your table.
Set up your sweep.
Set up your camera.
Set up your product in the middle of the surface.
Set up the reflector card.
Take the picture and evaluate.
Get your pictures retouched.
If you are a regular reader of our blogs, then you might already know about our endeavors. We at Ecommerce Photography India, are always concerned about increasing your brand values and conversion rates. So, if you want to add new dimension to your online selling experience then just drop us mail and we will assist you towards the best.
We provide a wide range of product photography services in quite affordable prices.